 This post will take you the steps of how to easily install and setup email submit forms in your website using the autoresponder Mailchimp and an easy-to-use submit form design tool.
Mailchimp List Building and Management
Mailchimp is an email autoresponder that allows you to build and manage email lists from your website’s traffic. It lets you to create opt-in forms which you can place anywhere on your website in an attempt to keep in contact with your traffic and gives you the ability to tell your users about new products, services, discounts, or updates you might have to offer them.
Getting Started
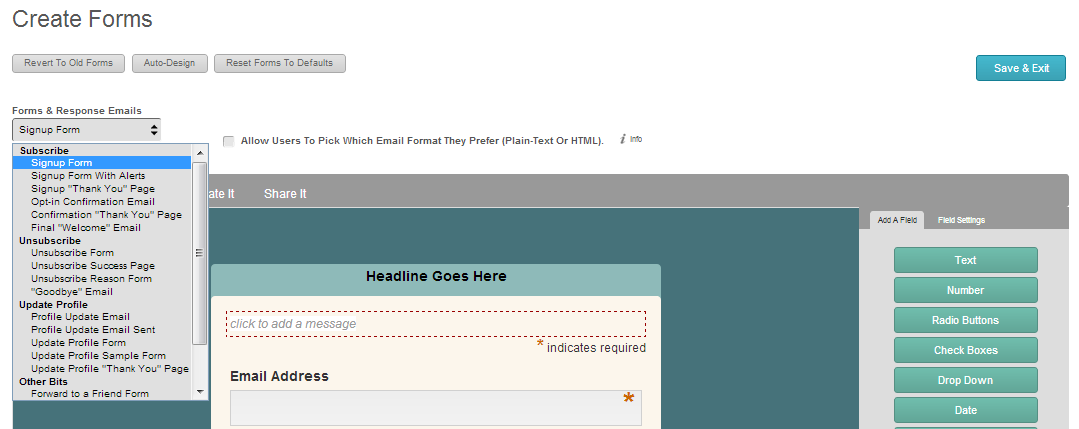
As you’re guided through the setup process after you’ve created your free account, you can choose the layout and design of your opt-in form along with your confirmation page, thank you page, and about 12 other responses or forms. The design interface for the forms in Mailchimp makes form creations incredibly simple.

The Sign Up Form
As I mentioned at the beginning of this post, we‘re also going to explore a simple submit form design tool that will really make your submit form pop. So I’m not going to discuss the different designs of the form. Just make sure that you’ve properly included all of the inputs you would like to use in your submit form (like “name” and “email”).
Placing Your Form On Your Page
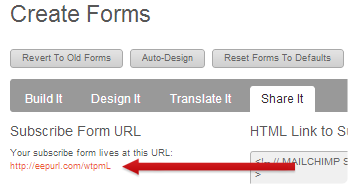
 After you’ve included all of your inputs, you can click on “Share It” which then brings you to a page where you can view where your subscribe form lives along with an option to embed a small subscribe form into your web page (which then leads them to your subscribe form). However, if we want to utilize other submit form designs, we’ll need to get creative.
Copy and Paste the Code Into Your Page
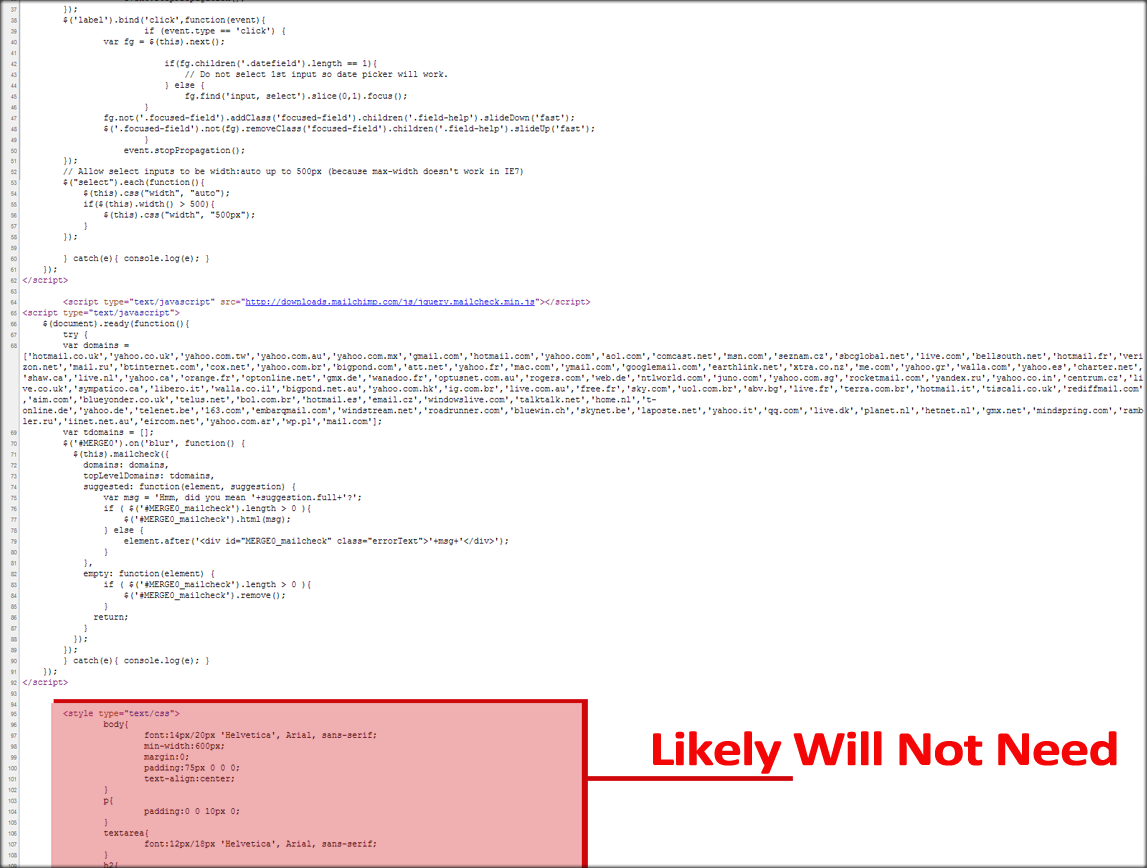
 First you’ll need to navigate to the url where your submit form lives. Once you’ve clicked on the url, you’ll be brought to a page with the form you just created. Next, you can just right click over the page, and click “view page source”. When the code pops up, you can start copying all of the code you see except for what’s inside the <style type=”text/css”> tag. Since we’re using a different submit form design though, we don’t need all of that .css stuff. Of course, if you want to keep the styles, I would suggest placing them in a .css file and linking to that style sheet in your web page.
Introducing: UI Parade
Once you’ve edited and pasted your submit form from into your web page, you can head on over too UI Parade to design a sleek submit form. UI Parade is a website where designers share some of their interface design ideas.
But UI Parade isn’t just a showcasing site where you might be able to find some design inspiration, it’s also home to UI Live Tools; a free online design app center that allows you to easily create your own UI elements with almost no coding knowledge.
Form Builder
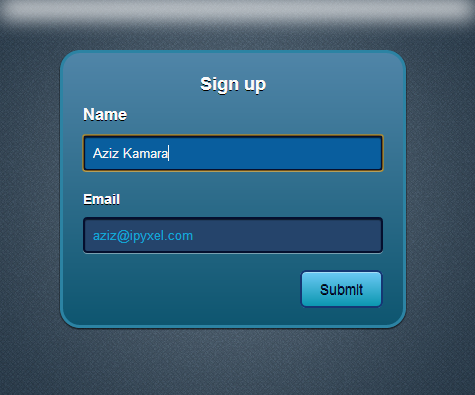
UI Livetools has 4 tools that allow you to create buttons, ribbons, icons, and submit forms. Just select the Form Builder to begin designing your submit form. Once inside, you can choose the color gradient of your entire form including shadows and highlights, as well as the color of your text input fields, lables, and the design of your submit button.
Full CSS Design

Perhaps the greatest feature of the UI Livetools is not their usability, but the fact that the design is all html/css based. That way, everything looks sleek and professional without requiring a bit of coding knowledge. While this design tool may not be robust, it certainly is easy to work with and is visually appealing.
Placing Your Designed Form Into Your Web Page
Once you’ve designed your submit form, you can grab your custom code by clicking the “Generate HTML” and “Generate CSS” buttons and placing that content into your web page’s PHP/HTML file. To keep things clean, you may want to save your form’s css in a separate style sheet. Next, you just need to edit a few input variables, and you’ll be ready to go!
Finishing Up With Some Edits
After you’ve grabbed the html for your newly-designed submit form, you’ll need to change some things in your code. Keep in mind that you still need some of the values you pasted in from the form code you got from Mailchimp. So What you need to do is create a sort of hybrid which crosses the input values, actions, and ids from Mailchimp and the design code from UI Parade. Below is a basic example of how you’ll need to change your code:
|
<form class=”form-container” action=”http://youtube.us5.list-manage.com/subscribe/post” method=”POST”> <input type=”hidden” name=”u” value=”7f0104276456d7bbef3fc5bb5″> <input type=”hidden” name=”id” value=”6cf36bec01″> <div id=”mergeTable”> <div id=”mergeRow-0″> <div class=”form-title”><label for=”MERGE0″><strong>Email Address</strong> <span class=”asterisk”>*</span></label> </div> <div> <input class=”form-field” type=”email” autocapitalize=”off” autocorrect=”off” name=”MERGE0″ id=”MERGE0″ size=”25″ value=””> </div> </div> <div class=”mergeRow dojoDndItem mergeRow-text” id=”mergeRow-1″> <div class=”form-title”><label for=”MERGE1″>First Name</label></div> <div class=”field-group”> <input class=”form-field” type=”text” name=”MERGE1″ id=”MERGE1″ size=”25″ value=””> </div> </div> </div> <br> <div> <input type=”submit” class=”submit-button” name=”submit” value=”Subscribe to list”> </div> </form>
|
In the above code, the red is what I had to add from Form Builder to the existing code I got from Mailchimp whereas the gray is what was deleted from the code I got from Mailchimp. What you should be left with is what’s in red and black.
Once you’re all done changing your code, you can then place this form anywhere on your web page and you’ve got a css-designed email submit form that will help to make your submit pages look unique, clean, and professional
Can you get away with using affiliate links or cpa offers in Mailchimp? If so, how/?
That’s a good question, Keno. Mailchimp lays out some rules regarding affiliate products, and they’re pretty firm, but there is a small amount to work with. You just have to be very careful.
For a more lenient autoresponder, you may want to check out http://www.aweber.com/>Aweber ($1-Month-Trial) or Reachmail (Free for 15,000 emails/month).
That’s a good question, Keno.
Mailchimp lays out some rules regarding affiliate products, and they’re pretty firm, but there is a small amount to work with. You just have to be very careful.
For a more lenient autoresponder, you may want to check out Aweber ($1-Month-Trial) or Reachmail (Free for 15,000 emails/month).